

Here you will blossom
Hydrangeas for rooms, balconies and gardens

Dear private customers,
Welcome to our virtual greenhouse on behalf of our entire team of employees and the owner family Pellens. We look forward to welcoming you here and introducing you to the most beautiful flowering plant in the world – at least that’s what the hydrangea is to us.
If you would like to buy hydrangeas, you are welcome to visit our farm shop in Geldern during the spring months. The farm shop is currently closed for the season. We expect to reopen in April 2025. Unfortunately, we cannot offer you an online shop or mail order service, as this cannot be implemented by us in terms of personnel.
At the bottom of this page you will find our care tips to help you look after your hydrangeas at home. We publish further detailed care instructions and seasonal decorating ideas on our blog at www.hortensien.eu every week. You can also gain an insight into our production methods and our efforts to achieve a high level of sustainability via our social media channels on Facebook and Instagram.
Hydrangeas inspire us with their abundance of colour right into autumn, their large flowers and the many possibilities for wonderful decorations, whether freshly cut or dried. We hope that you too will blossom.
Kind regards from Vivian and Andreas Pellens
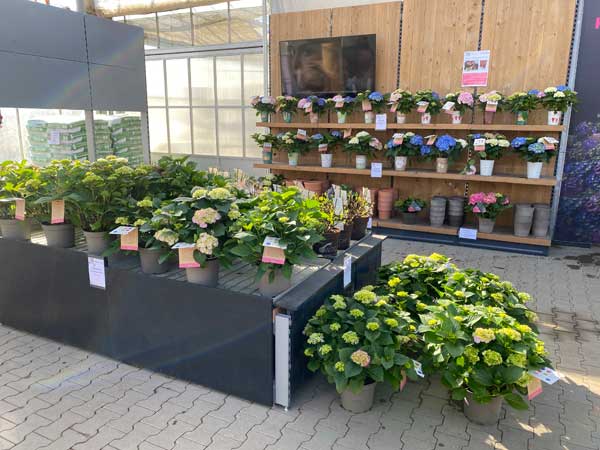
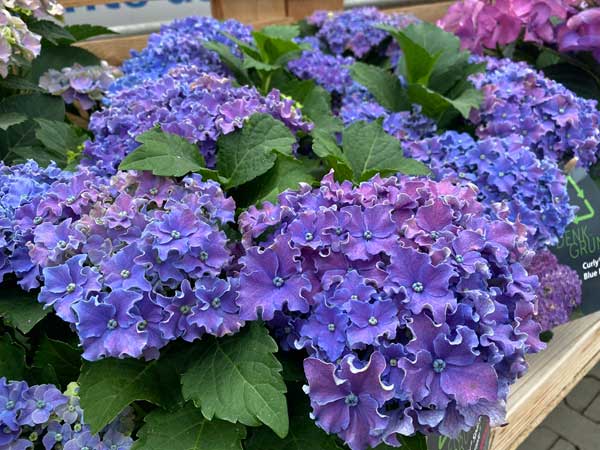
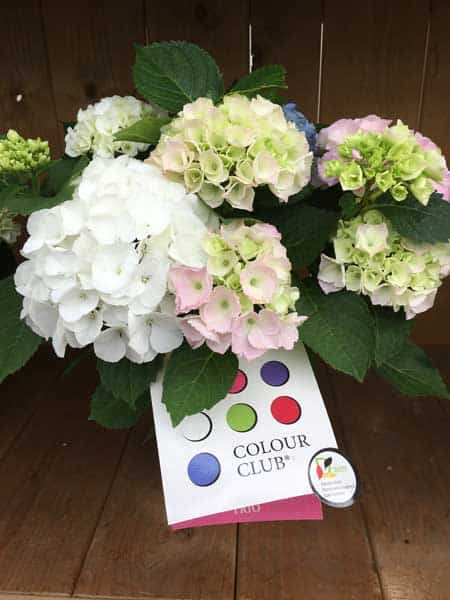
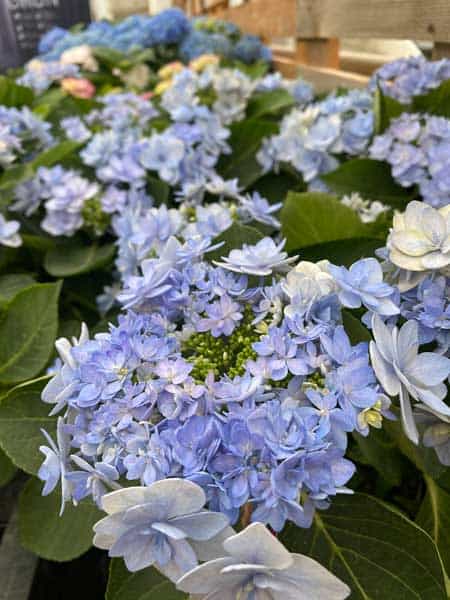
Shop impressions


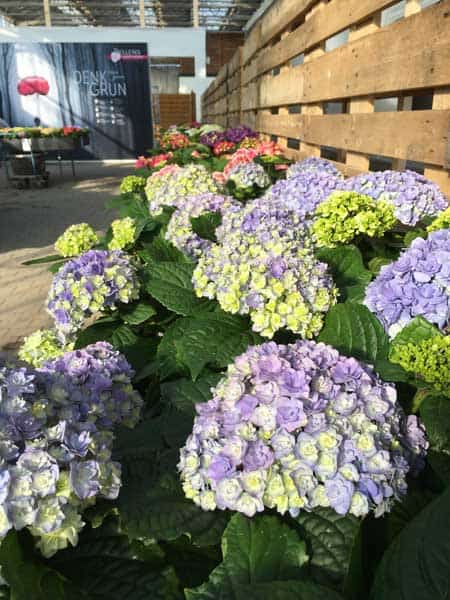

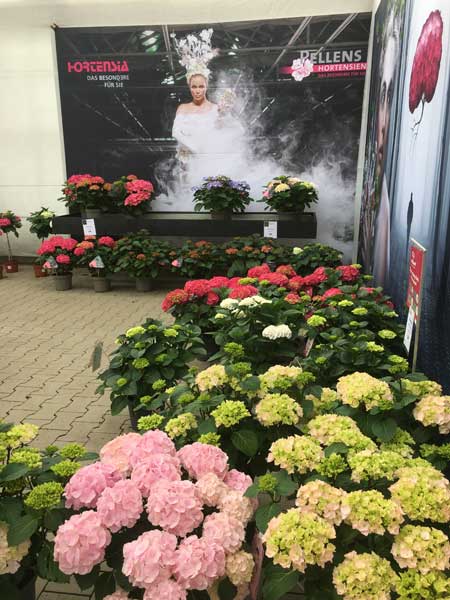
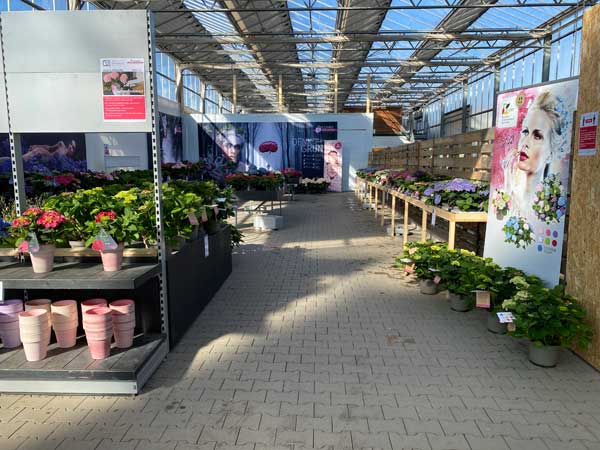
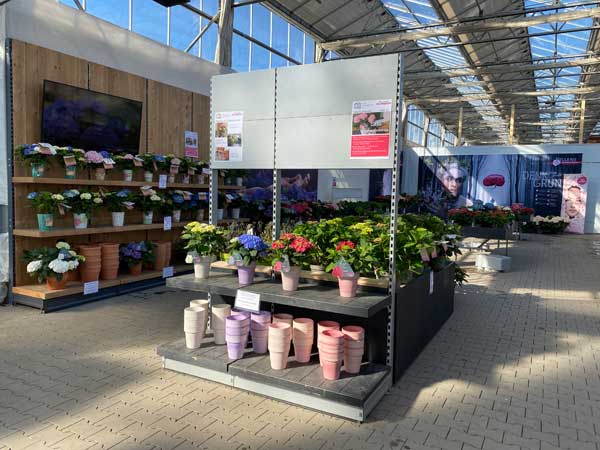
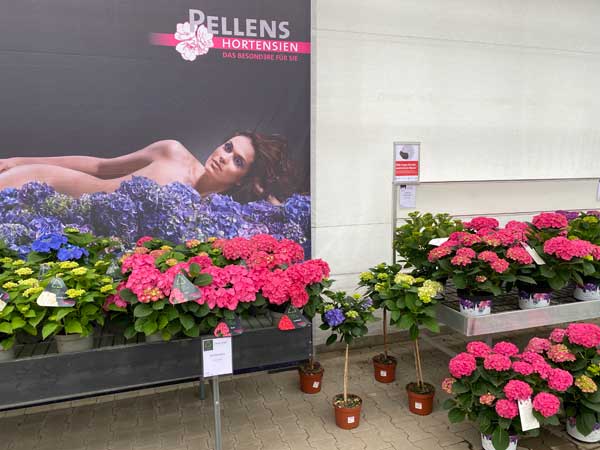


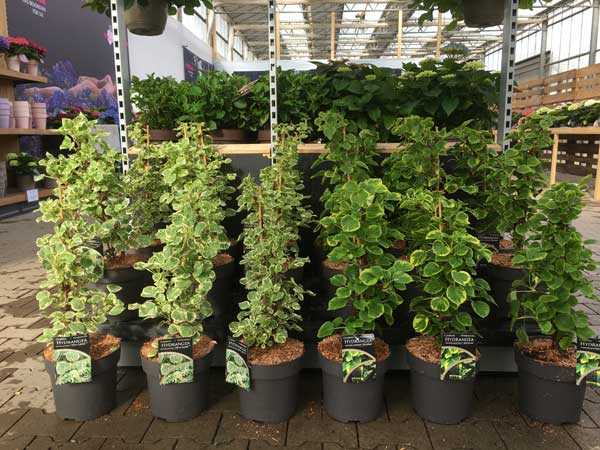
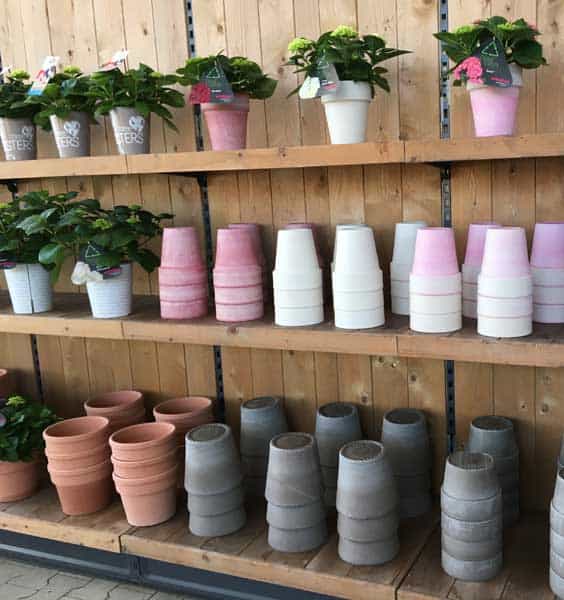
Farm sale currently closed
You can buy directly from us during the hydrangea season in our farm-gate shop. The farm sale is currently closed.
Another tip for shopping with us: As we work with a trust fund and there are no sales staff on site, please remember to bring sufficient small change. Unfortunately, it is not possible to give personal advice on site, but we always have up-to-date care tips posted in the shop and more can be found on this website and on the Hortensia blog at www.hortensien.eu.
“Faszination Hortensien” (“The fascination of hydrangeas”)


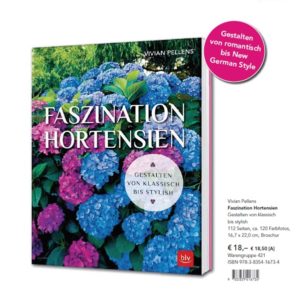
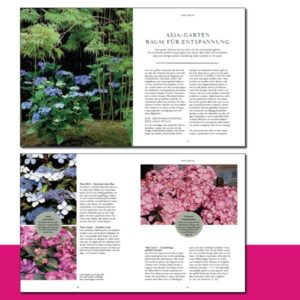
A book specifically about designing with hydrangeas, written by Vivian Pellens with the expertise of our hydrangea nursery. Get to know the different garden styles that you can realise with hydrangeas. From the natural garden to romantic vintage and Asian austerity to the New German style. You will also be introduced to the hydrangea varieties that match each design style. These include only varieties and new cultivars that are available everywhere, easy to care for and versatile. With examples for small and large gardens, balconies, terraces and indoors.
112 pages, approx. 120 colour photos, brochure
The author is Vivian Pellens, journalist and PR manager, and as the owner’s wife, she is of course also active in the Pellens hydrangea company. Among other things, she writes the Hortensia blog with care tips for hydrangeas at www.hortensien.eu.
We wish you a good gardening season.
Your Pellens team
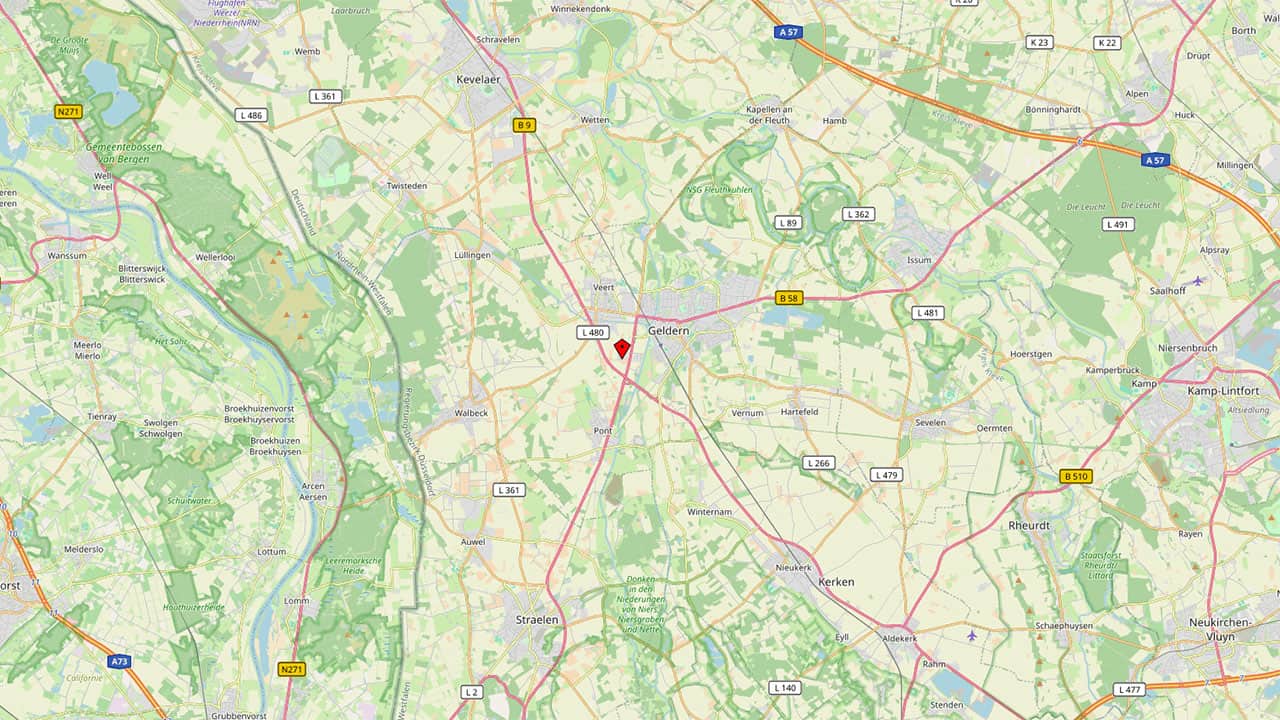
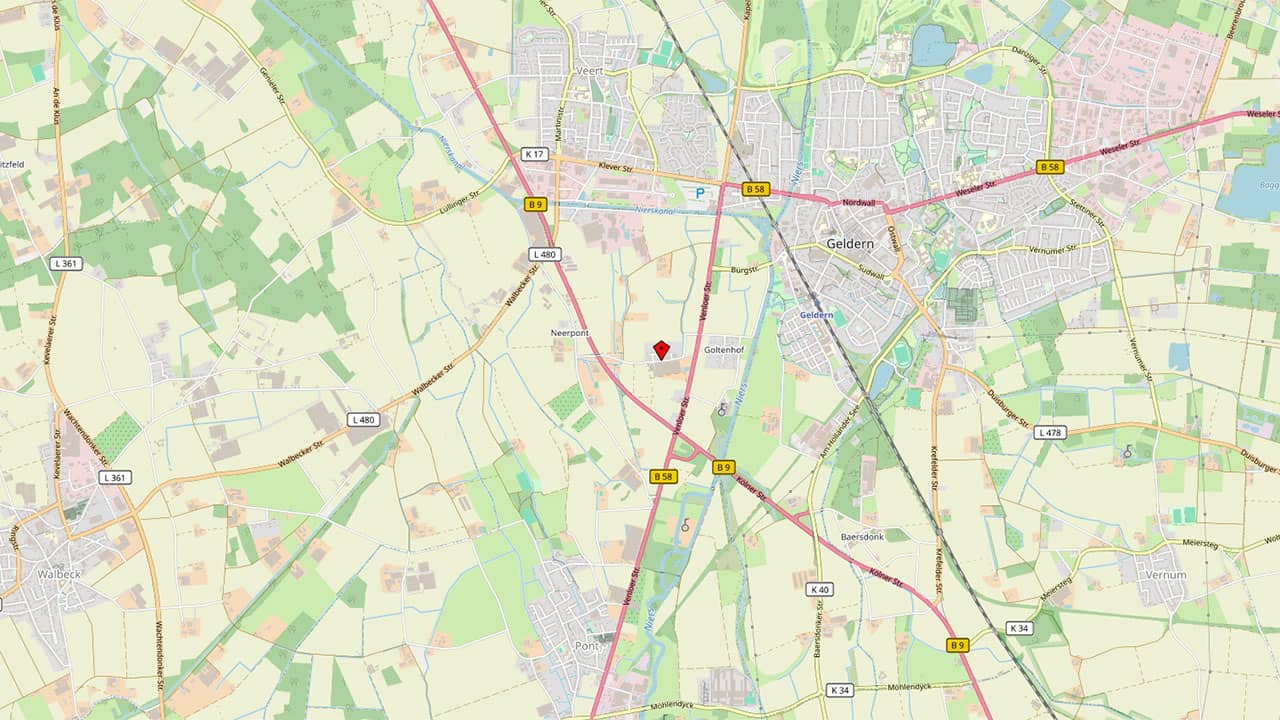
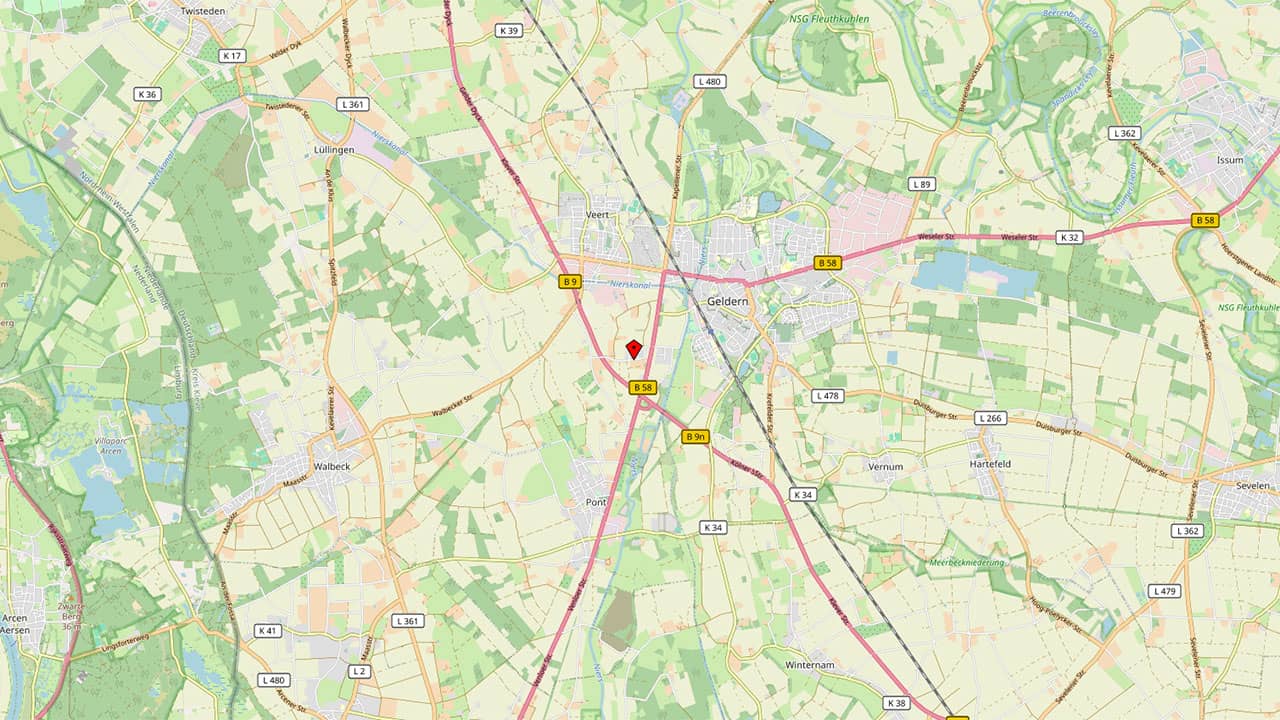
Pellens Hortensien
St.-Adelheid-Weg 9
47608 Geldern

Tips
There are hydrangeas for different locations. Both shady and sunny locations can be planted with hydrangeas, you just need to choose the right species and varieties. Hydrangeas also prefer a fresh, humus-rich, yet well-drained soil. They need a lot of water as they evaporate a lot through their large flowers and leaves, but waterlogging is deadly as the roots will rot very quickly.
Generally speaking, hydrangeas can be divided into two groups that have different needs. This is (also) due to their respective origin. There are the Asian species, which have adapted to more humid, semi-shaded woodland edges in their homeland and prefer semi-shade and humus-rich soil accordingly.
And there are the American varieties, which also thrive very well in partial shade, but have also made friends with sunnier locations and somewhat sandier soils. This does not mean that the Asian varieties can never be found in the sun. They can also get used to more sun – as long as they are not exposed to other stress factors. In the Azores, for example, and in the south of France, Asian hydrangea varieties are often found in full sun. But there they often get a cooling breeze from the sea and the winter temperatures are moderate. The bottom line is that enough “feel-good factors” have to come together for a hydrangea to do well in one location.
How and when to plant hydrangeas depends on the hydrangea in question. Is it a hydrangea freshly bought from the gardener in bloom? Am I transplanting a hydrangea from one garden bed to another? Or should an older potted hydrangea be planted in a larger pot or bed? There are different “best planting times” depending on the situation.
When is planting done?
Case one: I have just bought a freshly flowering hydrangea from the gardener. These may only be planted outside permanently when temperatures no longer fall below 5 degrees Celsius. This is usually the case from mid-May, after the famous ice saints. However, hydrangeas can also be planted outside later, virtually throughout the summer, in containers or in beds. By August at the latest, however, you should leave the plant outside permanently so that it can prepare for winter.
Case two: An older potted hydrangea that has been outside for some time is to be transplanted into a bed or a larger pot. Such hydrangeas can be transplanted virtually all year round, provided it is frost-free. This is because they are already accustomed to the outdoors and their root ball will not be damaged during transplanting. This means that the plant can continue to be well supplied with nutrients and water and can also form new roots. There are probably two best times for transplanting: These are in spring and late summer. In other words, outside the most stressful times.
Case three: A hydrangea is to be moved from one garden bed to another or from there to a pot. In this case, part of the root ball will inevitably be damaged when the hydrangea is dug up and fine roots will break off. This work should therefore be done outside the stressful flowering period or the exhausting winter, preferably in early spring or late summer to early autumn. Then the hydrangea can use its strength to form new roots.
First dive, then plant
Freshly planted plants can initially only draw nutrients and water from their “old” root ball – logically, that’s where the roots are. To ensure that the plant gets enough water right from the start, you should place this root ball in a bucket of water for about an hour before planting, depending on its size. This allows it to soak up the water thoroughly. If it is quite dry, it can easily happen that watering after planting does not help at all: because the water then only flows away to the outside, but does not penetrate the root ball. Water prefers to go to water, so to speak.
Planting hole and soil
The planting hole in the bed should be dug about twice as wide and deep as the root ball of the hydrangea. This ensures that the soil is well loosened all round, roots can find their way more easily and excess water can seep away. This planting hole is best filled with hydrangea or rhododendron soil or the garden soil is mixed with such soil. This ensures that the soil has the right, low pH value and the right nutrients for good rooting. You can also plant the hydrangea in a small depression so that the water does not run out when watering. And if some soil does slip in over time and the hydrangea ends up a little “under the ground”, it won’t mind at all.
Correct watering is particularly important
Proper watering of the hydrangea is particularly important in the first few weeks after planting. At this point, the hydrangea will gradually develop new roots, which will also lead into the surrounding soil. In the first few weeks, care must be taken to ensure that the small ball of soil in the centre gets sufficiently wet. It is therefore best to water directly into the centre of the plant below the leaves using a hose or watering can. And it is also better to water a lot once a day so that it really penetrates deeply, rather than a little several times. The hydrangea recognises whether there is moisture in the deeper layers. If it is permanently rather dry there, it will form fewer roots there, instead expanding its root system laterally at the surface – and will then always be dependent on fresh watering from above. This is particularly unfavourable in rainy summer periods.
“It’s not growing!”
One last tip: It is normal for hydrangeas not to grow “like lightning” in the first few weeks in their new location. At first, it uses its energy to form new roots, which it needs for the nutrient supply. After a while, it will grow faster at the top. Imagine you are moving house. You probably also switch on the fridge and go shopping before you make the garden pretty, don’t you?
Nutrients such as nitrogen, phosphorus and potassium are to plants what bread is to humans. They occur naturally in the soil, but not always in the quantities required by the plant. So the gardener fertilises accordingly, tailored to the composition of the soil – and above all to the needs of the plant. Because, as with humans, “too much” is also unhealthy for the plant.
Less nitrogen from summer
Hydrangeas change their way of life in late summer. Whereas growth and flowering were previously the main focus, it is now about preparing for winter. The plant also needs different nutrients for this. The composition of the fertiliser must therefore be changed from mid-August.
In late summer, “too much” nitrogen is particularly unhealthy for hydrangeas. Hydrangeas need nitrogen (chemical symbol: N) for their growth, as it is used to build up protein. From the end of July, however, the plant must lay the buds for the following year and thicken and harden the cell walls of the freshly grown stems so that they become frost-resistant. However, an excessively high nitrogen content in the soil prevents this.
Phosphorus (P – usually contained in fertilisers as P2O5) and potassium (K – usually contained in fertilisers as K2O), on the other hand, support ripening and frost resistance.
Fertilisers are always specified in ratios. The following can be used as a guideline for hydrangeas: During the growth phase (spring to summer), fertilisers with a nitrogen to potassium ratio of around 4:5 should be used. In late summer, use fertiliser with a ratio of around 1:7.
When can I cut?
Hydrangeas are generally pruned in spring when the weather is frost-free. The exact time in spring depends on the type of hydrangea. And the local weather conditions, which can change from year to year. The species of pruning type 2 (see below), which flower on the new shoots, can be pruned as early as the end of February/beginning of March, depending on the weather. On the other hand, you should wait until the late frosts are really over before pruning those of pruning type 1, which flower on the old wood. And, as much as hydrangea lovers usually have an itch in their scissors in spring, this will only be the case after the Ice Saints in mid-May. Hydrangeas as a whole are naturally very cold-resistant, but the newly sprouting buds are sensitive to frost. The late frosts at the end of April/beginning of May can therefore be dangerous for them. On freshly cut branches, frost can also penetrate the cut and cause damage. Patience is therefore essential.
How do I prune hydrangeas?
How deeply I can and must prune hydrangeas depends first and foremost on the species. There are basically four types of pruning into which hydrangeas can be categorised.
Pruning type 1
For hydrangeas of the species Hydrangea macrophylla (also known as the bigleaf hydrangea) and Hydrangea aspera (the roughleaf hydrangea), only the old, dried-up flowers from the previous year are usually cut off directly above the new buds. This is because these hydrangea species bloom on the “old” wood. The shrubs start forming their buds for the following year in the fall. If you prune these hydrangeas back too much in spring, you will also be cutting back the flower buds. This means that they will not flower again this year.
The plant itself does not mind being cut back more severely. If a macrophylla becomes too large, you can continue to cut it back. However, it is best to do this at the beginning of July, when the plant may still be producing new flower buds for the following year.
On the other hand, older, densely growing hydrangeas can benefit from a “rejuvenating pruning” every now and then. This involves cutting about a third of the branches off just above the ground, preferably the thickest and oldest ones. This encourages the plant to form new shoots, which then produce more flowers.
TIP: If you love the large-flowered farmer’s hydrangeas but are unsure about pruning, you should buy a so-called remontant variety. These special hydrangeas form flower buds on the old and new wood – so even late frosts or deep pruning can’t harm them.
Pruning type 2
Hydrangeas of the species “Hydrangea paniculata” (panicle hydrangea) and “Hydrangea arborescens” (snowball hydrangea) can be cut back completely to just above the ground. This is best done by leaving two, but at least one, bud set per shoot. This is because these types of hydrangea only start forming flower buds on the shoots that are now growing in spring. It is not necessary to cut them back completely every year if you want the bush to grow larger. However, it does encourage flowering. And if the shoots get too long after a few years, they can fall over – at which point, at the latest, you should cut them back severely.
TIP: Exceptions are the panicle hydrangea varieties “Praecox” and “Dharuma” – they also flower on old wood and are treated according to pruning type 1.
Pruning type 3
The two hydrangea varieties, ‘Hydrangea sargentiana’ (velvet hydrangea) and ‘Hydrangea petiolaris’ (climbing hydrangea), do not need to be pruned at all. However, they can be both shortened and thinned out by removing individual shoots.
Pruning type 4
There is also a hydrangea that should not be pruned at all if possible: Hydrangea quercifolia (oakleaf hydrangea). Otherwise, it often continues to grow in an unattractive manner. Therefore, only dried or frozen plant parts and the previous year’s flowers should be removed in late spring.
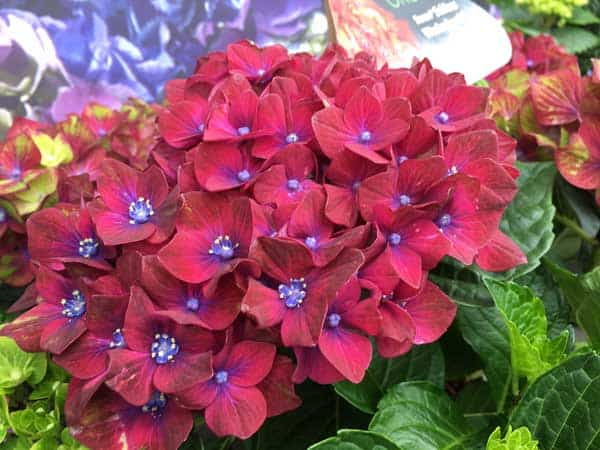
A fascinating characteristic of coloured hydrangeas is that they can change colour. Pink-coloured ones can turn blue, red ones can turn dark purple. And vice versa: blue turns pink, dark purple turns red. Only white farmer’s hydrangeas do not change colour in this way.
Hydrangeas need two things to remain or turn blue or purple: enough aluminium sulphate in the soil and a very low pH value of the soil to be able to absorb the aluminium. If the plant absorbs enough aluminium sulphate and this meets the naturally occurring dye delphinidin in the petals, this dye changes and now appears bluer. Conversely, blued hydrangeas turn pink or red when the aluminium supply in the soil decreases or the pH value increases so that less aluminium can be absorbed.
Let’s now take a closer look at the blueing involved:
1. pH
As mentioned, hydrangeas like acidic soil, especially for bluing. The pH value indicates how acidic a soil is. The lower the indicated number, the more acidic the garden soil or potting soil is.
Hydrangeas like a pH value of between 4 and 6, regardless of the blueing. They have thus developed a survival advantage over other plants in the competition between species, because many plants do not tolerate such acidity so well. As a result, however, they now also need this soil in order to absorb the nutrients they need. If the soil is not acidic enough or too acidic, they starve, grow poorly or even die. Aluminium is best absorbed at a soil pH value of 4-5, so if you want to blue your hydrangeas, you should achieve this.
The pH value of your own garden soil can be easily determined using measuring sticks, which are available in garden centres and DIY stores. And lawn clippings or coffee grounds can be used to acidify it naturally and sustainably. You can also use peat. Vinegar as an aid, as is sometimes recommended, is not advisable here. It acidifies the soil too much and only for a short time. And in case of doubt, it will only harm the soil organisms and the hydrangea roots.
Special hydrangea and rhododendron soil is also acidic and is therefore a good choice for potted hydrangeas or when added generously to a planting hole.
2. blue fertilizer or hydrangea blue
If the pH is right, aluminum sulfate must now be added. In some soils, it is already present naturally, so nothing more needs to be done. If this is not the case, it can be added. For this purpose, so-called “hydrangea blue” and “hydrangea blue fertilizer” are available from specialist retailers. These two agents should be clearly distinguished: Hydrangea blue is intended solely for blue coloring. Hydrangea blue fertilizer, on the other hand, also contains nutrients for the plant, hence the word “fertilizer” in the name. We would recommend using pure hydrangea blue. Blue dyeing and fertilizing are two different things. Fertilizing is not always necessary when you want to blue. In a mixture, the dosage is never optimal. I always say: you also add salt and pepper separately when cooking and don’t keep them mixed together in a tin.
When dosing the hydrangea blue, it is best to initially follow the instructions on the pack and gradually work out your own quantity to suit your soil, plant size and desired plant colour.
As a supplement: Hydrangea blue and blue fertiliser should also not be confused with blue grit. Blue fertiliser is a pure fertiliser. The attribute “blue” here merely refers to the colour of the fertiliser pellets, not a colouring effect.
3. alum
Alum is also often recommended for bluing hydrangeas. This is also a good option. But be careful: the term “alum” is now used for various chemical compounds. In this case, it refers to potassium aluminum alum, also known as potash alum or aluminum alum. It is a double salt consisting of aluminum and potassium and is available in pharmacies and sometimes in gardening stores. To dye hydrangeas blue with alum, it is either dissolved in water and then poured or sprinkled around the plant and raked in a little.
If you buy alum from the pharmacy, you will not be given any dosage instructions, so you need to proceed with caution here. A rule of thumb would be:
When do I blanch my hydrangeas?
The optimum time for colouring is spring, when the plant starts to bud. This is when the hydrangea stores the aluminium sulphate in the flower so that the colour change can take place. If you want a deep blue, you can add more in autumn, i.e. when the hydrangea puts on the new buds for the following year. These two applications are enough. Once the flowers have been “finished” by the plant, it is difficult for them to change colour. This is usually the case when the flower spikes have reached a size of 2 to 3 centimetres.
Is aluminium sulphate harmful?
It cannot be denied that aluminium sulphate can also have negative effects for two reasons. You should therefore only ever give as much as is really needed.
Firstly, it is a salt. If too much is added, the soil becomes salty and this burns the roots of the plants, possibly even causing them to die. With rain or irrigation water, however, the sulphate is gradually released again and diluted to completely harmless levels.
Secondly, aluminium acts as a neurotoxin in humans and animals in correspondingly high doses. You should therefore make sure that no animals can get hold of the hydrangea blue or alum, for example by raking it into the soil. Gloves are a good idea when handling. However, if used responsibly, we believe it is perfectly acceptable to blue your hydrangeas. As with all things in life, it’s the quantity that counts.
What’s the best way to get hydrangeas through the winter in a bed or container? We can give the all-clear: Hydrangeas are very cold-resistant and overwintering is no magic trick.
1. hydrangeas in the flower bed
If hydrangeas – of any kind – are already well established in the bed, they generally do not need any care or winter protection in Central Europe. Hydrangeas generally tolerate frost down to around -10 degrees Celsius without any problems, and many varieties can even withstand -20 degrees. Only a few more unusual varieties are more sensitive (see point 3). And in the event of prolonged sub-zero temperatures without protective snow cover or in windy locations, winter protection in the bed can be useful to prevent individual parts of the plant from freezing.
However, the greatest danger for hydrangeas in winter is not the frost itself, as many people think, but the lack of water resulting from the frost. Hydrangeas still evaporate water in winter, even when they are leafless. And must absorb new water via the roots to survive. If the soil in the root area of the shrubs freezes through permanently, no water can be absorbed – the hydrangea dies of thirst. Older plants whose roots already reach deep into the soil, on the other hand, are well protected. Younger, smaller plants in regions where the soil freezes through root-deep for long periods in winter can use a warming layer of foliage on the ground, at least in the first year.
When we say that hydrangeas are frost-resistant, we are talking about the survival of the whole plant. If the flower buds of the farmer’s hydrangea (species name: Hydrangea macrophylla), which are already laid in autumn, slowly open in spring, they can easily freeze if there is another late frost (from around February, depending on the region). Our tip: Keep an eye on the weather forecast and cover the hydrangeas with plant fleece for a short time (e.g. overnight) if there is a risk of frost.
2. hydrangeas in a tub – to bring in or not?
In principle, exactly the same applies to hydrangeas in pots as applies to hydrangeas in beds: the shrubs are frost-resistant and can remain outside in winter. In pots, everything described above in the section “Hydrangeas in beds” applies.
However, the risk of the soil in the pot freezing through completely is naturally greater than in the garden soil. For this reason, potted hydrangeas need to be protected more from “dying of thirst through frost”. The smaller the pot, the greater the risk. It is therefore best to move potted hydrangeas to a location protected from the wind and sun, for example against a house wall, as soon as frost threatens. Leaves or jute can also be used to create a warming cushion around the pots (see point 4 below).
Finally, check regularly that the soil is moist enough and water on frost-free days if necessary. Avoid waterlogging at all costs, otherwise the roots will rot. It is helpful to place clay feet under the pots so that excess water can drain away unhindered through the drainage hole.
… but they can also be kept inside
If you live in a very frosty region and/or prefer to be on the safe side, you CAN also keep your potted hydrangeas inside over the winter. In the house, in the garage, in the basement… However, they should not be kept too warm, because hydrangeas need “winter cold” to fully develop their flower buds, for example, and to stimulate growth in spring. Temperatures between +10 and +2 degrees are optimal here. However, they do not need light during the winter rest period. And water – see above.
3. which varieties are frost-resistant?
Farmers’ hydrangeas (H. macrophylla), panicle hydrangeas (H. paniculata), snowball hydrangeas (H. arborescens) – they are all generally hardy. There are only a few, rather rare varieties that are more sensitive. These amateur varieties are only sold by reputable suppliers with a variety label stating that they require winter protection. Hydrangeas that are sold, for example, by discounters or DIY stores without a variety name are 99 per cent certain to be widespread, hardy standard varieties.
Oakleaf hydrangeas (H. quercifolia), which generally prefer a more sheltered location, are also more sensitive. Variegated varieties (i.e. with two-coloured leaves) are also usually somewhat more susceptible to the cold.
4. Properly covered
Here are a few more ideas for different forms of winter protection:
Brushwood, i.e. branches of evergreen plants such as fir, holly or box, can be laid over the entire plant and wedged together. But make sure that enough rainwater can still get through.
Plant fleece is suitable as a short-term cover for the entire plant, for example against late frosts. However, it is not a good long-term solution, as it does not allow as much rainwater through on the one hand, and on the other hand moisture can collect under the cover, especially in the bed – which hydrangeas do not like either.
Wire, wooden planks or similar materials can be used to build a kind of basket in the bed or around groups of containers. Then fill it loosely with leaves – an ideal, environmentally friendly heat bed that also allows rainwater to pass through.
Jute, fleece or bubble wrap are materials that can be used to wrap individual containers and protect them from frost. Bubble wrap provides the best warmth and can also look good with an additional layer of jute or fleece. Tie the “tub coat” tightly with ribbons to prevent it from being blown away by winter storms. Embellished with coloured ribbons or homemade stamp motifs, this winter protection becomes a real decorative tip! But please only wrap the outer walls of the pots, the soil area at the top and the drainage hole at the bottom must remain open for air supply and watering.
Pieces of polystyrene on which potted hydrangeas are placed protect them from the cold below. But pay attention to the water drainage: Use pot feet or stones as spacers. Or cut a suitable hole in the polystyrene if there is water-permeable soil underneath (e.g. soil or gravel).
The best protection against diseases and pests for hydrangeas is, first of all, an optimal location and sufficient water and nutrients. Well cared for hydrangeas are very little susceptible and can tolerate minor infestations without any problems. Nevertheless, there are of course somewhat more critical moments, for example during the winter or with indoor hydrangeas.
Largemouth weevil
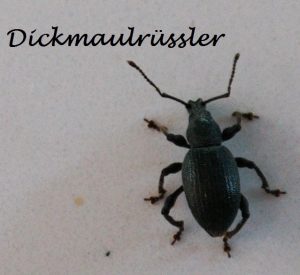
One of the most common pests of hydrangeas (and some other garden plants) in our part of the world is the European hydrangea weevil. It can be recognised by conspicuous feeding marks on the edges of buds, leaves and blossoms, known as “cove feeding”. If, on the other hand, there are holes in the centre of the leaf, then the culprits are snails or caterpillars.
Much more unpleasant than the holes, which hardly disturb the plant, is the damage that is not immediately visible: the larvae of the beetle live in the soil and eat away at the roots. This can lead to the death of the plant if there is a large infestation.
Nematodes, which can be bought in specialised shops and added to the irrigation water, help wonderfully against the larvae. This should be done in early spring and in August. The beetle itself, which is around 12 mm in size, can hardly be seen on the hydrangeas as it is active at dusk and hides very successfully during the day. If you find it, it is best to collect it.
Hydrangea mealybugs
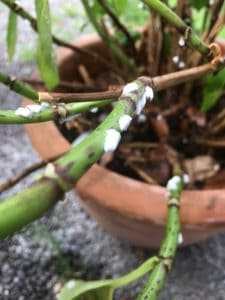
There are various subspecies of mealybugs, but what they all have in common is that the larvae hide in a cotton wool-like, white web. These tufts of wool often sit on the underside of the leaves, but also on the stems of the plants. The adult aphids later sit flat on the stems and undersides of leaves and are armoured with a solid shield, which unfortunately makes them very resistant to classic household remedies. The sucking insects are quite dangerous as they spread quickly, causing leaf loss and even the death of the infested plant. You should therefore intervene as early as possible.
The woolly larvae sacs can be sprayed off with a strong jet of water. If you discover adult scale insects, you can brush the bare winter shoots vigorously before the leaves emerge or carefully scrape off the aphids. Densely colonised areas should be cut off. The unwanted inhabitants on the stems can be sprayed with a spray containing rapeseed oil so that they stick together – but be careful not to spray the leaves, otherwise they will also stick together and die. Ladybirds are natural enemies of scale insects.
Spider mites
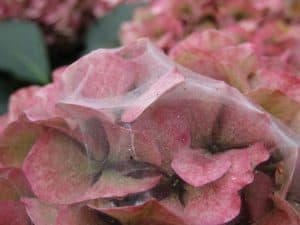
Spider mites are very common on indoor hydrangeas and sometimes in sheltered areas, for example on warm balconies. The animals suck out the plant sap and thus weaken the hydrangeas considerably. When infested, silvery spots appear on the leaves, followed later by yellow to brown spots that gradually dry up. After some time, a fine, often extensive webbing can also be seen on the plant.
Spider mites like warm and dry air, such as direct heating air. Higher humidity and cooler temperatures (ventilation, spraying) can help. If the spider mite infestation is already present, predatory mites or sprays containing rapeseed oil can help. However, the latter should be handled with care to prevent the entire leaves of the hydrangea from sticking together, as they will then also die.
Bud rot (Botrytis)
If you place your potted hydrangeas in their winter quarters before frost, you should urgently keep an eye out for greyish mould. The Botrytis mould fungus is found everywhere in our country and, under certain conditions, can spread very well in winter quarters. It likes it moist and cool, but free from draughts.
There are sprays against the fungus, but unfortunately you can’t really get rid of it anyway because, as I said, its spores are everywhere. It is therefore usually sufficient in the private sector to remove diseased parts of the plant or to wipe off the mould (with gloves) and to improve the ventilation in the winter quarters.
Powdery mildew
A whitish-grey coating under or on the leaves, which can be wiped off, is a sign of powdery mildew infestation. This is also a fungus that spreads through air movement. It can occur both indoors and in the garden. Avoid fluctuating temperatures, direct heating air and draughts in the room to prevent it from spreading.
Sick leaves should be removed, otherwise unfortunately only a fungicide will help against powdery mildew.
Aphids
The work of aphids can be recognised by sticky, deformed leaves. Ants are also often found in large numbers, protecting the aphids and eating the sticky droppings. The aphids themselves can also be easily recognised.
Fortunately, aphids are easy to treat. Spraying with water, nettle broth or a potassium soap solution often helps. You can also encourage the many natural enemies of aphids: Insects, spiders and birds.
Thrips
These insects also suck the plant sap from buds and leaves, creating silvery suction points on the leaves. The bitten plant parts wither, leaves and flowers open deformed. Brown faecal spots may also be found on the underside of the leaves. The thrips are elongated and can therefore be easily distinguished from the roundish aphids.
Unfortunately, apart from predatory mites and predatory bugs, only chemical products from specialised retailers can help against thrips. However, they are rarely found in private homes.
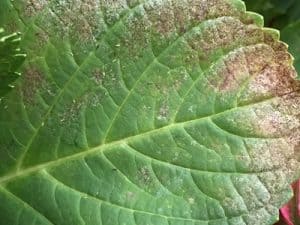
Leaf spot fungi

The symptoms are brown leaf spots that dry up and then crack. The leaf spot fungus can attack the plant particularly if it is poorly supplied with nutrients and if there is high humidity. Prevent this by fertilising and checking the pH value of the soil.
It is best to remove affected parts of the plant to prevent the fungi from spreading further.
Overview of the most important types
Asian hydrangeas
Bigleaf hydrangea (Hydrangea macrophylla)
Japanese maple hydrangea (Hydrangea serrata) Rough-leaved hydrangea (Hydrangea aspera)
Sargent hydrangea (Hydrangea aspera subsp. sargentiana)
American hydrangea species
Forest hydrangeas (Hydrangea arborescens)
Panicle hydrangeas (Hydrangea paniculata)
Oakleaf hydrangeas (Hydrangea quercifolia)